

Cement calculation may seem like a mundane task when it comes to tile work, but it is a crucial step in ensuring the structural integrity and aesthetic appeal of any project. Whether you are a professional contractor or a DIY enthusiast, understanding the fundamentals of cement calculation is essential for achieving a successful outcome. In this article, we will delve into the intricacies of calculating cement for a 100 sq.ft area in tile work, providing you with the necessary knowledge and guidelines to ensure accurate measurements and a flawless finish. So, let’s explore the world of cement calculation in tile work and learn how to get it right every time.
Cement calculation in tile work of 100 sq.ft area
Cement is a crucial material used in construction, especially in tile work. It is responsible for binding the tiles together and making the surface strong and durable. The calculation of cement in tile work is essential to ensure the right amount of cement is used, avoiding any wastage and maintaining the quality and integrity of the final product. In this article, we will discuss how to calculate cement in tile work for a 100 square feet area.
Firstly, it is important to understand the concept of tile work and its terminology. Tile work is the process of installing tiles on a surface to create a tiled surface. The most common unit for measuring area in construction is square feet (sq.ft). One square feet is equal to 12 inches by 12 inches, which is equivalent to 0.0929 square meters.
Before calculating the amount of cement required, it is crucial to determine the type of tile to be used and the thickness of the tiles. The thickness of the tile is usually mentioned by the manufacturer in the packaging. In this example, we will be using 12” x 12” tiles with a thickness of 0.5 inches.
To calculate the cement requirement for 100 sq.ft area, follow the steps below:
Step 1: Determine the number of tiles needed
The first step is to determine the number of tiles required to cover 100 sq.ft area. To do this, divide the area of the surface (in sq.ft) by the area of one tile (in sq.ft), i.e.,
Number of tiles = (Area of surface in sq.ft) / (Area of one tile in sq.ft)
= 100 sq.ft / 1 sq.ft
= 100 tiles
Step 2: Calculate the total area of tiles
Now, multiply the number of tiles by the area of one tile, i.e.,
Total area of tiles = Number of tiles x Area of one tile
= 100 tiles x 1 sq.ft
= 100 sq.ft
Step 3: Determine the volume of the tiles
Since we know the thickness (0.5 inches) of the tiles, we can calculate the volume of the tiles using the formula,
Volume of tile = (Area of tile in sq.ft) x (Thickness in feet)
= (1 sq.ft) x (0.5 ft)
= 0.5 cubic ft
Step 4: Calculate the total volume of tiles
Multiply the volume of one tile by the total number of tiles,
Total volume of tiles = Volume of one tile x Number of tiles
= 0.5 cubic ft x 100 tiles
= 50 cubic ft
Step 5: Convert volume to bags of cement
Cement usually comes in bags, and each bag has a specific volume. To calculate the number of bags of cement required, divide the total volume of tiles (calculated in step 4) by the volume of one bag of cement. Typically, one bag of cement has a volume of 1 cubic ft.
Number of bags of cement = (Total volume of tiles) / (Volume of one bag of cement)
= 50 cubic ft / 1 cubic ft
= 50 bags
Hence, for 100 sq.ft area of tile work, 50 bags of cement will be required. It is always advisable to purchase a few extra bags of cement to account for any wastage during the construction process.
In conclusion, the calculation of
flooring tiles, wall tiles and wall tile for kitchen

Flooring tiles are an essential element of any construction project, whether it is a residential or commercial property. They are used to cover the floors and provide a smooth, durable and aesthetically pleasing surface. Tiles are available in various materials, sizes, colors and designs, making them a versatile choice for any type of space.
One of the most popular types of tiles used for flooring is ceramic tiles. These tiles are made from a mixture of clay, sand, and water, which is then fired at high temperatures to create a hard and durable material. Ceramic tiles come in a wide range of styles and are known for their water resistance, making them ideal for use in bathrooms, kitchens and other high-moisture areas.
Porcelain tiles are also a popular choice for flooring. They are similar to ceramic tiles in terms of composition but are fired at a higher temperature, making them denser and more durable. Porcelain tiles can mimic the look of natural stone or wood, providing an elegant and luxurious touch to any space. They are also highly resistant to stains, scratches, and moisture, making them suitable for high-traffic areas.
Another type of tile commonly used for flooring is vinyl tiles. These tiles are made from synthetic materials such as PVC and are relatively inexpensive, easy to install and maintain. Vinyl tiles come in a variety of colors and designs, including those that mimic the look of natural materials like wood and stone. They are also water-resistant, making them a popular choice for kitchens, bathrooms, and laundry rooms.
Wall tiles are another important aspect of interior design. They are used to cover walls and protect them from moisture, stains, and damage. Wall tiles are also used to enhance the aesthetic appeal of a space and can be found in a variety of materials and designs.
Ceramic and porcelain tiles are the most commonly used types of wall tiles. They are durable, easy to clean and can be found in a myriad of designs and colors, making them suitable for any room in the house. Wall tiles made from natural stone, such as marble or granite, are also gaining popularity for their elegant and luxurious look.
For kitchen walls, mosaic tiles are a popular choice. These tiles are made from small pieces of glass, stone or ceramic arranged in a pattern to create a stunning visual effect. Mosaic tiles are durable, easy to clean and can add a touch of color and texture to the kitchen.
In conclusion, flooring tiles, wall tiles, and kitchen wall tiles are crucial elements in any construction project. They not only provide a functional and durable surface but also add aesthetic value to the space. With a wide variety of materials, colors, and designs available, these tiles offer endless possibilities to create a beautiful and practical living space. As a civil engineer, it is important to carefully consider the type of tiles to use for different areas of a construction project to ensure longevity and satisfaction for the client.
Wall tile installation process

Wall tile installation is an important part of any construction or renovation project. It not only adds aesthetic value to a space, but also serves as a protective barrier against humidity and water damage. As a civil engineer, it is crucial to understand the process of wall tile installation to ensure a durable and professionally finished project.
1. Pre-Installation Preparation
The first step in wall tile installation is to prepare the surface where the tiles will be installed. The surface should be clean, flat and dry. Any bumps, cracks or holes should be repaired prior to installation. The type of wall surface and the tile size and material will determine the type of adhesive and preparation required. Filming surfaces, such as drywall, should be primed to ensure a strong bond with the adhesive.
2. Layout and Measurement
Before beginning the installation, it is important to plan and visualize the layout of the tiles on the wall. This will help in determining the number of tiles needed and where to start the installation from. A level, chalk line and measuring tape will be essential in ensuring a precise layout. It is recommended to start at the center of the wall and work outwards.
3. Applying Adhesive
Once the layout is determined, the adhesive can be applied to the wall. There are two main types of adhesives: thin-set mortar and mastic. Thin-set mortar is usually used for larger tiles and in areas prone to moisture, while mastic is suitable for smaller tiles and dry areas. The adhesive should be applied using a notched trowel at a 45-degree angle, creating ridges for the tiles to grip onto.
4. Installing the Tiles
Tiles should be placed onto the adhesive firmly and evenly. It is crucial to ensure that they are level and evenly spaced, using tile spacers if necessary. Any adhesive residue should be cleaned before it dries, as it can be difficult to remove once dried. Special attention should be paid to corners and edges, as they may require custom cuts to fit the tiles together seamlessly.
5. Grouting
After the tiles are installed and the adhesive is completely dry, the grout can be applied. Grout is a cement-based mixture that fills the gaps between tiles and provides a finished look to the installation. It is mixed according to the manufacturer’s instructions and applied using a grout float at a 45-degree angle. Once the grout is evenly spread, excess can be cleaned off using a damp sponge.
6. Finishing Touches
The final step in wall tile installation is to clean and polish the tiles. A grout sealer can also be applied to protect the grout from staining and moisture. Once the sealer is dry, any remaining residue should be cleaned off, leaving a professional and aesthetically pleasing finish.
In conclusion, wall tile installation is a detailed and precise process that requires proper preparation, planning, and execution. As a civil engineer, it is important to ensure that all construction and building codes are followed, and the installation is done with accuracy and quality to ensure a durable and long-lasting result.
What is cement mortar thickness in tile work
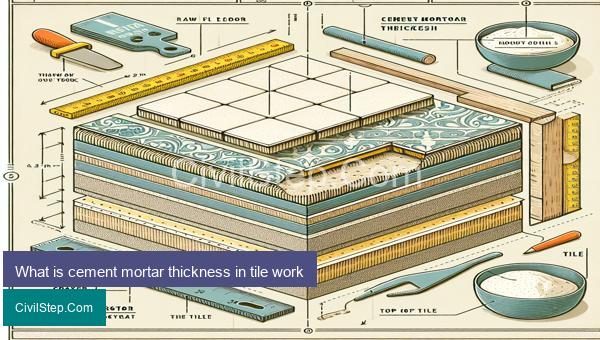
Cement mortar thickness in tile work refers to the amount or thickness of mortar that is applied onto a surface before laying down tiles. Mortar is a mixture of cement, sand, and water that is used as a bonding agent between tiles and the surface they are being applied to. It is an essential component in tile work as it ensures the stability and durability of the tiled surface.
The thickness of cement mortar varies depending on the type of tile being used, the surface it is being applied to, and the overall design of the project.
In general, the recommended thickness of cement mortar for tile work is around 10 mm. However, this may vary depending on the size and weight of the tiles. Larger and heavier tiles may require a thicker layer of mortar to evenly distribute the weight and prevent them from cracking or breaking.
Another factor that influences the thickness of cement mortar is the surface on which the tiles will be installed. If the surface is uneven, it may require a thicker layer of mortar to create a level and stable base for the tiles. On the other hand, a smooth and level surface may only need a thin layer of mortar for the tiles to adhere to.
The design of the project also plays a role in determining the thickness of cement mortar. If the tiles being used have uneven edges or a larger size, they may require a thicker layer of mortar to create a level and flush finish. Additionally, if the tiles are being laid in a pattern or design, the mortar thickness may vary to accommodate for the specific layout.
It is important to note that the thickness of cement mortar must be consistent throughout the project to ensure a level and uniform finish. Uneven application of mortar can lead to uneven heights and cause the tiles to crack or become loose over time.
In conclusion, the thickness of cement mortar in tile work is a crucial factor that must be carefully considered to ensure a strong and long-lasting tiled surface. It is recommended to consult with a professional or follow manufacturer guidelines when determining the appropriate thickness of mortar for your specific project.
Quantity of cement mortar for wall tile installation of 100 sq.ft

As a civil engineer, I have been involved in various construction projects and one common aspect is the installation of wall tiles. Wall tiles are commonly used in both residential and commercial buildings for their aesthetic appeal, durability and ease of maintenance. One important factor in the installation of wall tiles is the quantity of cement mortar that is required.
Cement mortar is a mixture of cement, sand and water, which is used as a bonding agent between the wall and the tiles. The strength and durability of the tile installation depend on the quality of the cement mortar. Therefore, it is essential to calculate the correct quantity of cement mortar needed for the installation of wall tiles.
Here, we will discuss the quantity of cement mortar required for the installation of wall tiles on an area of 100 sq.ft.
Step 1: Preparation of surface
Before calculating the quantity of cement mortar, the wall surface needs to be prepared. The wall surface should be smooth, clean and free from any debris or dust. Any cracks or holes in the wall should be repaired before tile installation.
Step 2: Determining the thickness of the mortar
The thickness of the mortar depends on the type and size of the tiles being used. Generally, for wall tiles, the thickness of the mortar is between 6-8 mm. In this case, we will consider the thickness to be 8 mm.
Step 3: Calculation of area
The area of the wall to be tiled is 100 sq.ft. We need to convert this into square meters, as the quantities for cement mortar are usually given in square meters. 1 sq.ft is equal to 0.093 square meters. Therefore, the area in square meters will be 100 x 0.093 = 9.3 sq.m.
Step 4: Calculation of the required quantity of cement
The standard ratio of cement and sand for the mortar is 1:4. This means that for every 1 part of cement, we need 4 parts of sand. To calculate the quantity of cement required, we’ll use the following formula:
Quantity of cement = (Volume of mortar x Ratio of cement) / Sum of the ratio
The volume of the mortar can be calculated by multiplying the area and thickness. Therefore, the volume of the mortar will be 9.3 x 0.008 = 0.0744 cubic meters.
Quantity of cement = (0.0744 x 1) / (1+4) = 0.01488 cubic meters.
Step 5: Calculation of the required quantity of sand
The volume of sand required can be calculated by multiplying the volume of mortar with the inverse of the sum of the ratio.
Volume of sand = 0.0744 x (4/5) = 0.05952 cubic meters.
Step 6: Calculation of the water required
The water-cement ratio is generally 0.4. This means that for every 1 kg of cement, we need 0.4 liters of water. Therefore, the quantity of water required will be:
Water required = 0.01488 x 0.4 = 0.005952 liters.
This is approximately 6 ml of water.
Step 7: Final calculation
The final calculation for the quantity of cement mortar required for the installation of wall tiles on a 100 sq.ft area is as follows:
Cement – 0.01488 cubic meters or 68.16 kg
What is cement mortar ratio in tile fixing
Cement mortar ratio in tile fixing refers to the proportion of cement to other materials used to bond tiles to a surface. It is an essential aspect of tile installation, as it determines the strength, durability, and appearance of the finished product.
The most commonly used cement mortar ratio for tile fixing is 1:3, where one part of cement is mixed with three parts of sand. This mixture is commonly known as the cement-sand mortar, and it acts as the bonding agent between tiles and the surface.
The purpose of the cement-sand mortar is to create a strong bond between the tile and surface, which can withstand the weight of foot traffic and other forces. It also serves as a leveling agent, ensuring that tiles are aligned correctly and evenly.
The ratio of cement to sand in the mortar mix may vary depending on the type and size of tiles, the surface condition, and the environment in which they will be installed. For example, smaller tiles may require a higher cement ratio to ensure adequate bonding, while larger tiles may require a lower ratio to avoid cracking due to shrinkage.
One of the essential factors in determining the correct cement mortar ratio for tile fixing is the water-cement ratio. The amount of water added to the mortar mix has a significant impact on its strength and durability. Too much water can weaken the mortar, leading to cracks and a weak bond between the tile and surface. On the other hand, too little water can make the mix clumpy and difficult to work with.
It is crucial to follow the manufacturer’s recommendations for the appropriate water-cement ratio in the mortar mix. Generally, a ratio of 0.4 to 0.6 is recommended for tile fixing. This means that for every 1 part of cement, 0.4 to 0.6 parts of water should be added.
In addition to the correct cement-sand-water ratio, the tile fixing process also involves proper surface preparation, including cleaning, priming, and leveling, to achieve the best results. The quality of the tiles and adhesives used also play a crucial role in the success of tile fixing.
In conclusion, the cement mortar ratio in tile fixing is a critical factor in achieving a strong and durable bond between tiles and the surface. It is essential to follow the recommended ratios and best practices for a successful and long-lasting tile installation. As a civil engineer, I understand the importance of proper mortar mix ratios and their impact on the overall quality and stability of any construction project, including tile fixing.
Cement mortar calculation in tile fixing
Cement mortar is a mixture of cement, sand, and water used as a binding material in construction for various purposes such as masonry, plastering, and tile fixing. In tile fixing, cement mortar plays a crucial role in securing the tiles to the surface and providing a strong and durable bond.
The calculation of cement mortar for tile fixing involves determining the quantity of cement and sand required based on the area to be covered and the thickness of the mortar layer. Here are the steps involved in calculating the cement mortar for tile fixing:
1. Determine the area to be covered: Measure the length and width of the area where the tiles will be fixed and multiply them to get the total area. For example, if the length is 10 feet and width is 5 feet, the total area will be 10 x 5 = 50 square feet.
2. Determine the thickness of the mortar layer: The thickness of the mortar layer depends on the size and type of tiles being used. Generally, a thickness of 10-15mm is recommended for tile fixing.
3. Calculate the volume of mortar: To calculate the volume of mortar, multiply the total area by the thickness of the mortar layer. In our example, if the thickness of the mortar layer is 10mm, the volume of mortar will be 50 x 0.01 = 0.5 cubic feet.
4. Determine the proportion of cement and sand: The proportion of cement and sand in the mortar mix depends on the strength required and the type of tiles being used. As per standard practice, a 1:4 cement-sand ratio is commonly used for tiling. This means that for every 1 part of cement, 4 parts of sand are required.
5. Calculate the quantity of cement: Multiply the volume of mortar by the proportion of cement. In our example, the quantity of cement required will be 0.5 x 1/5 = 0.1 cubic feet.
6. Calculate the quantity of sand: Multiply the volume of mortar by the proportion of sand. In our example, the quantity of sand required will be 0.5 x 4/5 = 0.4 cubic feet.
7. Convert cubic feet to bags: Cement and sand are usually sold in bags, so the quantities calculated above need to be converted to the number of bags required. One bag of cement is equal to 1.25 cubic feet and one bag of sand is equal to 1.5 cubic feet. In our example, the number of bags required will be 0.1/1.25 = 0.08 bags of cement and 0.4/1.5 = 0.27 bags of sand.
Note: It is always better to buy slightly more cement and sand than the calculated quantity to account for any wastage or errors during mixing.
In conclusion, the calculation of cement mortar for tile fixing is an essential step in ensuring a strong and durable tile installation. It is important to follow the proportion of cement and sand recommended for tiling and to use accurate measurements to achieve the desired strength and quality of the mortar mix.
How many cement in 1 square meter tiles

The amount of cement required for 1 square meter of tiles may vary depending on the size and thickness of the tiles. Generally, for standard size tiles (12 x 12 inches), a ratio of 1:3 is recommended, meaning 1 part of cement is mixed with 3 parts of sand.
To calculate the amount of cement needed for 1 square meter of tiles, we must first determine the thickness of the tile. Let’s assume the tile is 1 centimeter (cm) thick.
Step 1: Calculate the area of 1 square meter
Since 1 square meter is equivalent to 10,000 square centimeters, the area of 1 square meter of tiles will be 10,000 square centimeters.
Step 2: Calculate the volume of the tile
To calculate the volume, we need to multiply the area by the thickness of the tile. In this case, the volume of the tile will be 10,000 cm² x 1 cm = 10,000 cm³.
Step 3: Calculate the volume of the 1:3 cement-sand mixture
Since the recommended ratio for the cement-sand mixture is 1:3, the volume of cement is 1/4 of the total volume of the mixture. Therefore, the volume of cement required will be 1/4 x 10,000 cm³ = 2,500 cm³.
Step 4: Convert volume to weight
To convert the volume of cement to weight, we need to know the density of cement. The average density of cement is around 1440 kilograms per cubic meter (kg/m³).
To get the weight, we will use the formula:
Weight = Volume x Density
Therefore, the weight of cement required for 1 square meter of tiles will be:
2,500 cm³ x (1m³/1000000 cm³) x 1440 kg/m³ = 3.6 kg
This means that for 1 square meter of tiles, 3.6 kilograms of cement will be needed. It is important to note that this is just an estimate and the actual amount may vary depending on the quality of cement, tile size, and thickness.
In conclusion, for 1 square meter of tiles with a thickness of 1 cm, approximately 3.6 kg of cement is required. It is always best to consult with a contractor or a licensed engineer for a more accurate estimation based on specific project needs.
Conclusion
In conclusion, cement calculation plays a crucial role in tile work of any area, especially in a 100 sq.ft space. It is important to accurately calculate the amount of cement needed to ensure a strong and durable tile installation. By following the steps outlined in this article, one can easily determine the quantity of cement required for their specific project. It is also necessary to consider factors such as tile size, wastage, and thickness to avoid under or overestimating the amount of cement needed. Proper cement calculation is essential for achieving a flawless and long-lasting tile work, making it a crucial step in any construction or renovation project.